Tuesday, December 30, 2014

Back to crafting- finally!

I haven't posted (or crafted for that matter) for about 6 months as work has been manic! Things have finally slowed down a bit so I'm back to crafting, posting & challenges- yay!

Thankfully, lots of the challenge blogs I take part in have 'anything goes' challenges at the moment which is great as a starter for me again.

I am posting a Christmas card that I made for someone at work-


It was a quick & simple card to make perfect as I was last minute (surprise surprise!).

I started with a 6x6 white card blank that I covered using Craftwork Cards paper from one of their recent Christmas packs that include papers & sentiments. After attaching the backing paper to the card using double sided tape, I used a Sheena Douglass stencil and gold Buff It paste to add extra detail to the background. I took one of the message toppers from the Craftwork Cards kit that matched the backing paper. I wanted to create a gold mirror border for the topper (to match the stencilled design) but didn't have the right shape so I used one of my die-cut shapes to firstly cut the topper and then to make a mat to match. I used foam pads to mount the message topper to add a little extra height and interest.

I am entering this card into the following challenges:-

Sunday, July 6, 2014

Flying high...

Now that I've discovered the wonderful world of box cards, I keep coming up with loads of ideas that I want to try- so far this is definitely my favourite!

My colouring is not the greatest so I have signed up to a Skin & Hair class at Kit & Clowder. They ask you to colour an image before you start the class to compare to later on so I decided to colour a Mary Poppins digi that I love. I chose this because I had a great idea for a card so even though the colouring isn't brilliant, I think the card is.

Here it is...

I used a sheet of pale blue A4 cardstock to cut the box card base and then trimmed the flaps to just 5cm to show the base a little more. I used docrafts London dies to cut out 3 layers of London skyline and scored these to match the base of the box. I then attached them with plenty of double sided tape.

I cut DCWV blue cardstock (as it has a white core) to fit as mats for the flaps and back panel and then embossed them with a Clarity Stencils cloud design. I sanded back the card to show the white core through for the clouds and then edged each piece with white ink before adding to the card.

I then used scraps of blue card (from 2 card bases that didn't quite work) to make my interior supports for some clouds cut using the Cricut from some glitter card. I chose slightly different clouds from 3 different cartridges included in my subscription (Nate's ABC, The first few years & Groovy Times). I attached one cloud to the inside front of the box, 2 onto the 2 supports and one onto the back panel before adding the Mary Poppins digi, coloured with Spectrum Noirs & Promarkers, using foam pads.


I'm loving the fact that she's actually flying over the London skyline! :-)

I am entering this card into the following challenges:-
Fantabulous Cricut 'anything goes'
Crafts Galore 'stamp/digi' 31/7
Creative Inspirations 'anything goes' 8/7
A Blog Named Hero 'colour it in' 14/7
Catch the Bug 'anything goes' 19/7
Graph'It 'anything with an alcohol marker' 11/7

Tuesday, July 1, 2014

Super Sunflowers

I've been looking at 'pop up box cards' for a while and I really like the look of them however it wasn't until this week that I realised that they folded flat to go into an envelope. Now that I know that vital information (!) I thought I'd have a go at making one. I couldn't see the point before as how would anyone send it?

I've seen lots of people making them on the Cricut Explore Facebook page I'm a member of so I went back to those posts and looked at them a bit more closely. Everyone seemed to be recommending the templates at svgcuts.com so I went there. They have some brilliant designs for great prices and I got a set of 5 complete designs and 4 plain ones for less than £5. I started by making one of their set designs (floral box card) which I'm sure will get posted eventually but once I had the idea, I wanted to make my own design.

This is what I came up with


It uses DCWV papers, a sheet of 12x12 yellow cardstock and sunflower toppers (fake fabric flowers & chipboard). All of the small squares of patterned paper came from one striped 12x12 sheet that I cut down making the most of the different patterns. The taller front and back patterns came from another co-ordinating design. The different papers can be seen better in this photo.


The file from svgcuts cut out the card base and 2 inner topper holders. I used scraps of matching yellow card to create sticks for the flowers to stand out on.

I have made this card as a gift for the head teacher at my school. It has been a rough few weeks/month/year (!) and while some of us only have to deal with bits of it, she gets it all. She loves sunflowers so this will hopefully give her at least 1 smile tomorrow!

I am also entering this card into the following challenges:-
Crafting for All Seasons 'whatever the weather' 7/7 (sunflowers can make you feel sunny even on the wettest day!)
CRAFT challenge 'thank you' 2/7
The Pink Elephant 'anything goes' 7/7
Papertake Weekly 'anything goes' 8/7
Love to Create '3+ papers' 6/7
That Craft Place 'anything goes' 5/7

Monday, June 30, 2014

T.A.R.D.I.S.

Since I got my Cricut Explore, I have been a member of a fab Facebook group dedicated to helping each other out with any issues or good ideas we find. It's called 'let's learn cricut explore' and is well worth a look if you haven't found it.

A while ago, someone posted a photo of a brilliant doctor who card they had made using some svg's bought from a website I hadn't heard of before. The site is called Pretty Paper Pretty Ribbons and has a wide range of svg's available at great prices. I got 2 sets (the doctors and the doctors enemies) for less than £4 when converted via PayPal. They are quite complicated designs but the Cricut made it so easy.

The first thing I've made is this TARDIS shaped card. I have made one of these in the past but it took ages to work put all the sizes and cut everything by hand. This way was much quicker and neater.


I started by sizing the layered TARDIS to fit onto an A5 piece of card. I then copied the image, deleting all layers except the white base. I flipped this and then welded it to the base of the first image to make a shaped card base that would fit onto an A4 piece of card. I cut the other pieces from 3 different shades of blue as shown on both the image and the Cricut. I used double sided tape to layer up the different pieces.

The white windows are part of the design but the sign is not so I used one of the cut out sections as a template and drew onto some white card, cutting it slightly smaller to fit the aperture. I have left this blank as it would be perfect for a message. I also had to add the POLICE BOX label at the top by hand but I was lucky enough to win a Graph'It white marker a while ago and it was brilliant for this finishing touch.

I am entering this card into the following challenges:-
Paper Shelter 'travel the world' 1/7 (I can't think of any other way to travel the world than in the TARDIS but please delete if it does not match your theme enough!)
Daring Cardmakers 'no scissors' 4/7 (everything done on my die cutting machine)

Sunday, June 22, 2014

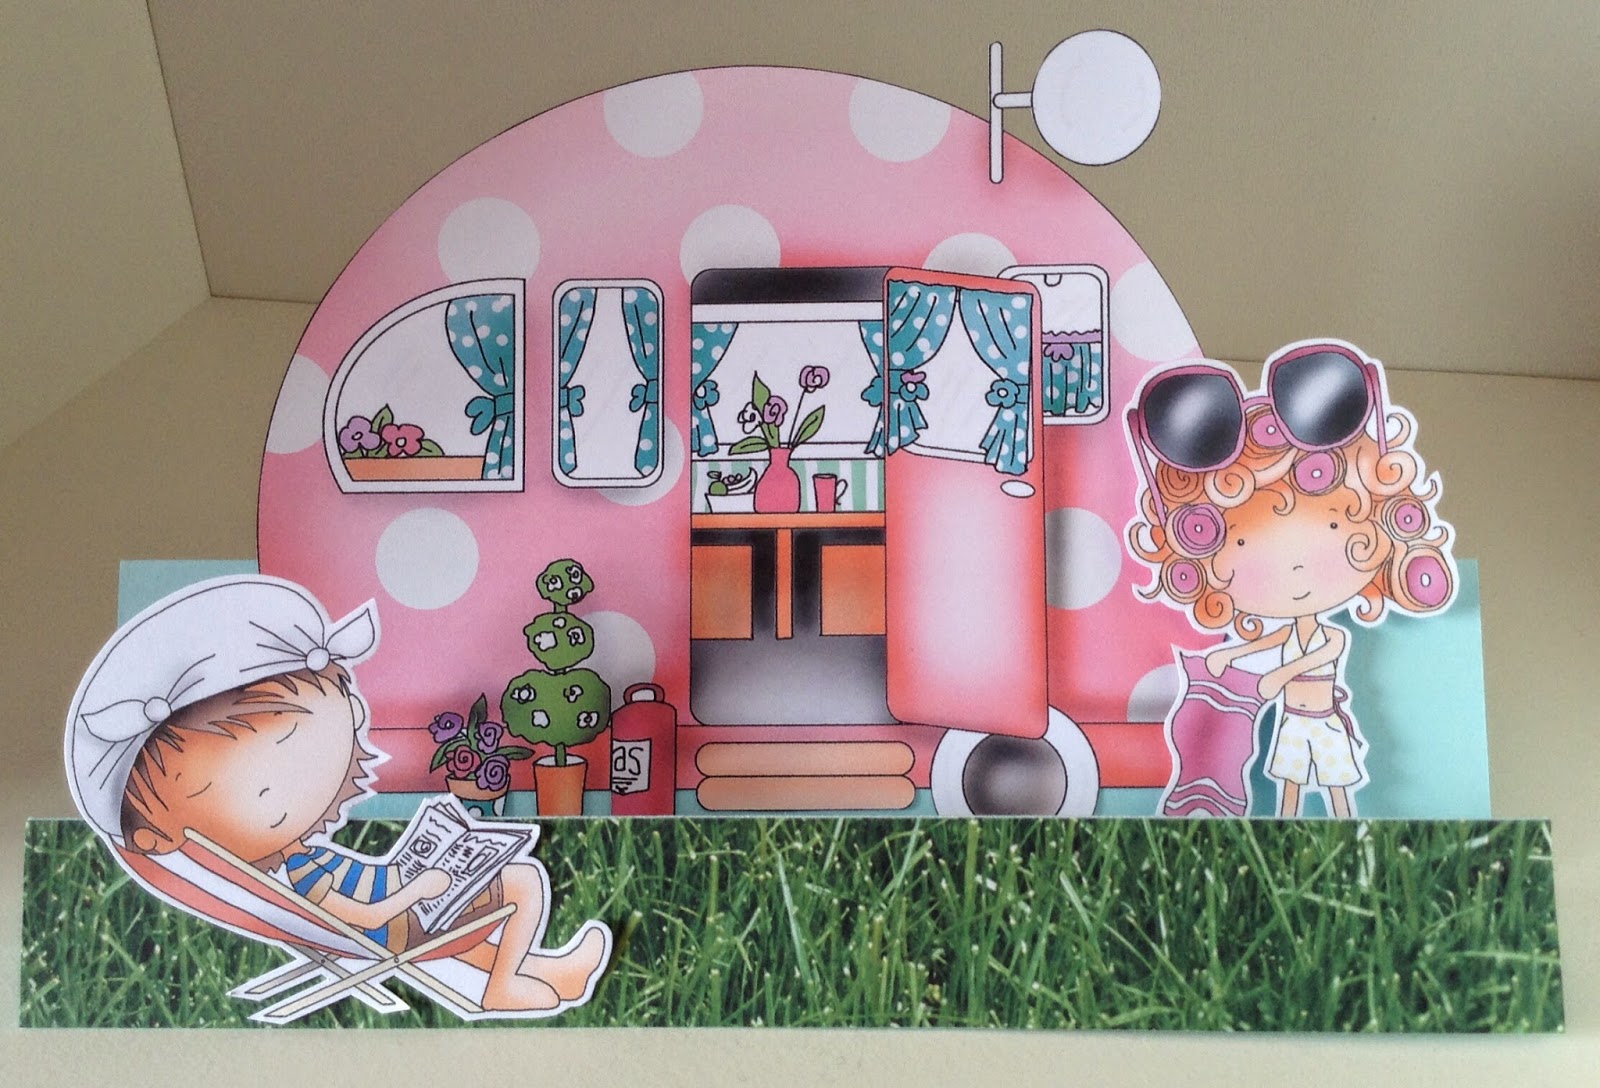
Caravan Holiday

I've been busy today making cards with some new goodies I got this week. I've been looking at the Polkadoodles Work and Play collections for a while so when there was a discount code on the Digi Choosday website this week I had to get them. Set 4 isn't yet available as a download so I just got sets 1, 2 and 3.

I made this card using elements from set 3


I really like these collections as they have pre-coloured digis as well as images that I can colour. I've used the pre-coloured option to make this card super quick. I printed the caravan to A5 size and the characters 9 to a page. I cut out the elements I wanted leaving a white border around the characters to help them stand out.

I then took a piece of A4 pale blue card and made a small stepper card using roughly 2/3 of the sheet. I attached some DCWV grass paper to the front step and then placed the deck chair man onto this step. I attached the caravan to the back step with double sided tape and used 3d foam on the lady.

I am entering this card into the following challenges:-
Craft Room Challenge 'sun, sand & surf' 23/6
Crafting for all seasons 'no squares' 23/6
Graph' It 'blonde hair' 27/6
Digi Choosday 'pink' 1/7
Clear it out 'anything goes' 24/6
Cute card Thursday 'seaside' 25/6
Crafts Galore 'stamp or digi' 30/6
Crafting Musketeers 'stamp or digi' 30/6

Monday, June 16, 2014

Quad bike

I haven't had much time for crafting this weekend as I've been selling a few goodies at a local Vintage Rally. I made some tractor, train and car themed cards and they went down really well. I did manage to get in the craft room for a few minutes though and make this card.


It's a continuation on my plan to make at least 1card from each of my topper boxes (I think I've managed about 5 boxes now!)

I started with the circle Kanban topper of the quad bike, mounting it onto a mat I die-cut from a tread plate pattern DCWV paper. I wanted a background that reflected the muddyness of the topper but I didn't have anything suitable in my stash so I made my own. I cut a square of green card to just smaller than the 8x8 base card and then put some Walnut Stain distress ink onto my blending mat. I sprayed the ink with water and then laid the green card onto it to pick up the splattered ink. The damp ink caused the card to warp so I let it dry and then sprayed my table with a small amount of water and placed the back of my green card into the water. When it was slightly damp, I moved it to a dry spot and weighted it down with some paper pads. After a couple of minutes, it was flat again.

I attached everything to my base card, finishing with the speedo topper.

I am entering this card into the following challenges:-
Crafty Cardmakers 'circles' 22/6
Digi Choosday '2 papers' 24/6
Papertake Weekly 'boys' 17/6
Cute Card Thursday 'so macho' 18/6
Penny's Paper Crafty Challenges 'anything goes' 17/6
Totally Gorjuss 'dad' 21/6
Love to Create 'anything goes' 22/6

and also the Creatalicious CT call which closes on July 15th- check it out here.

Saturday, June 14, 2014

Potions class

Regular blog readers will know that I love anything Harry Potter and I've recently been crafting something for myself!

When I visited the Making of Harry Potter at Leavesden studios last year, I got hold of 3 house pennants (unfortunately the Gryffindor ones were sold out- good excuse to go back though!) and I've been looking for a way to display them ever since. I eventually found some large bottles in IKEA for just £1 each that were perfect. They looked a bit dull so I've Potterfied them a bit!


 The Skele-Gro bottle is an IKEA one, the 2 ribbed jars are from QD (the bigger one being only £2 which I thought was a bargain) and the smallest one was in a pack from The Range.

I started by using both acrylic and emulsion paints to coat the inside of the bottles. When dry, I added the labels which I found on Pinterest. The smallest bottle is ready for Felix Felicis (liquid luck) but doesn't quite have a label yet as I need to print out a super small version. I'm now on the lookout for more unusual jars and bottles and a box for a Bezoar!

I am entering this project into the following challenges:-
A Blog Named Hero 'not a card' 14/6