Often when someone does or says something really stupid (and I do it myself fairly often), I think that maybe they are not actually stupid- I'm just a genius!!! Maybe I'm more of an optimist than I think?
Anyway, today, I am fairly convinced that I am actually a genius!
I've been learning how to become a better colourist with the Kit & Clowder skin & hair class for the last few months. I haven't been able to give it as much time as I'd like but I can still see an improvement already.
In the classes, Alyce uses brush nib Copics as her marker of choice whereas I own the original Spectrum Noirs with the bullet nib (and no option to change them for brush nibs). It might just be that I need more practice but I do find the flicking difficult with the bullet nibs so I've been looking into the idea of upgrading to the newer version of the Spectrum Noirs that you can get brush nibs for. I though about just buying the main skin colours used in the classes but, because Spectrum Noirs are not available individually, I'd still have to buy 78 pens just to get the 7/8 main skin tones- this seems a bit silly!
This is where the genius idea occurred!!!
On the Crafters Companion website, you can buy the blender pens separately (as a gold club inspire member I can get them for £1.27 and free p&p- can't beat that!) and the refill inks. I needed some refills anyway so as well as those, I ordered one of the separate blender pens to test out my idea.
When the blender pen arrived, I carefully removed both nibs and placed them, and the pen barrel, into my airing cupboard (the warmest place in my house) for a few hours. The nibs dried out really quickly but when I replaced the broad tip and then started to colour, some of the blender remained. I removed the nib again, and put the pen back into the airing cupboard. When I tried the pen again the next day, nothing came through the broad tip so it was time for stage 2!
I then took one of my skin re-inkers and used this ink (FS4) to re-ink the (now empty) new, blender pen. I left the ink to settle for a while (2/3 hours) and then tried it. In all honesty, the ink is working better from the broad tip end rather than the bullet which is a little pale at the moment- I think this is because the re-inker ink is put into the broad tip end. When I compare the colour coming from the blender pen to the colour from my original FS4 pen, the ink colour is very similar and, if anything, the new version looks brighter and slightly darker (possibly because my original is getting short of ink anyway).
I now plan to buy a pack of the brush nibs (which can be used as replacements for the broad tip in the new Spectrum Noir barrels) and then create my own brush nib Spectrum's for just the colours I need & use.
It will still end up costing more per pen than it would if I was buying a set but at least then I can just get the colours I actually need.
I am pretty impressed with my own ingenuity! Even if I do say so myself!!!
Showing posts with label Crafters Companion. Show all posts
Showing posts with label Crafters Companion. Show all posts
Sunday, February 22, 2015


Tuesday, January 13, 2015
hop hop hooray!
Here's another of my SWALK cards, this time using a topper that could be suitable for a whole range of occasions- new baby, exams, driving test, child's birthday, thank you etc.

I started with the topper which is printed from the SWALK cd and created my own message topper using the verse writer facility. I inked both of these pieces with 'salty ocean' distress ink and then mounted them onto a star print holographic mirror board. I then got a 6x6 white card blank and topped it with a Kanban star print paper. I then added the toppers and finished the card with 3 star gems.
I am entering this card into the following challenges:-
Creatalicious 'new beginnings' 14.1
Quirky Crafts 'clean & simple' 17.1
Creative Card Crew 'for a child' 18.1
Digi Choosday 'thanks' 20.1
Crafters Cafe 'new' 14.1
Crafty Catz 'polka dots' 15.1
Cute Card Thursday 'what's new?' 14.1

I started with the topper which is printed from the SWALK cd and created my own message topper using the verse writer facility. I inked both of these pieces with 'salty ocean' distress ink and then mounted them onto a star print holographic mirror board. I then got a 6x6 white card blank and topped it with a Kanban star print paper. I then added the toppers and finished the card with 3 star gems.
I am entering this card into the following challenges:-
Creatalicious 'new beginnings' 14.1
Quirky Crafts 'clean & simple' 17.1
Creative Card Crew 'for a child' 18.1
Digi Choosday 'thanks' 20.1
Crafters Cafe 'new' 14.1
Crafty Catz 'polka dots' 15.1
Cute Card Thursday 'what's new?' 14.1
Tuesday, June 10, 2014
Fancy frills
This is most definitely a move away from my usual style of card and, to be honest, not something I'll probably repeat too often! I recently ordered 2 crafters companion die'sire embossing and cutting dies which is the first time I've bought such an item. I haven't had much time to play yet but it was perfect for the current Graph'It challenge entitled 'frills & fancy'. It can be good to take on a challenge and try something new but you won't see many cards like this on my blog! (I'm also not sure how the camera has made the central heart look pink as it's exactly the same card as the surround but...)

It was a pretty simple card to make with the die doing most of the work!
I took a piece of A4 pearlescent card and placed the die carefully at the top of what would become the front. I used my Grand Callibur to both cut and emboss the design onto the card. I then cut a piece of lace to slightly wider than the card and attached it to the back of a length of ribbon (with a heart buckle already placed) using double sided tape. I overlapped the lace to create the ruched effect and then attached the 'skirt' to the card with more double sided tape.
To create the hanging heart, I took the die cut heart and attached a small loop of invisible thread to it. I then placed a pearl onto the top of the heart aperture and used this as the hook for the heart to hang from. It is a very pretty card and I'm sure lots of people will like it, it's just a big departure for me!
I am entering this card into the following challenges:-
Graph'It 'frills & fancy' 13/6
Creative Inspirations 'anything goes' 10/6
Crafty Catz 'inspired by a song' 12/6- 'hanging onto your love' by Take That
Crafty Calendar 'petals and pearls' 4/7
Totally Gorjuss 'embossing' 14/6
It was a pretty simple card to make with the die doing most of the work!
I took a piece of A4 pearlescent card and placed the die carefully at the top of what would become the front. I used my Grand Callibur to both cut and emboss the design onto the card. I then cut a piece of lace to slightly wider than the card and attached it to the back of a length of ribbon (with a heart buckle already placed) using double sided tape. I overlapped the lace to create the ruched effect and then attached the 'skirt' to the card with more double sided tape.
To create the hanging heart, I took the die cut heart and attached a small loop of invisible thread to it. I then placed a pearl onto the top of the heart aperture and used this as the hook for the heart to hang from. It is a very pretty card and I'm sure lots of people will like it, it's just a big departure for me!
I am entering this card into the following challenges:-
Graph'It 'frills & fancy' 13/6
Creative Inspirations 'anything goes' 10/6
Crafty Catz 'inspired by a song' 12/6- 'hanging onto your love' by Take That
Crafty Calendar 'petals and pearls' 4/7
Totally Gorjuss 'embossing' 14/6
Tuesday, May 27, 2014
Scruffy Little Cat
Another new product I've bought in the last few weeks is another new cd from Crafters Companion. It's called Scruffy Little Cat and has some modern female designs. It was a pick of the week on C&C but I got it straight from the Crafters Companion website after joining their Inspire club which gives you a 5% discount on every product. I also found a voucher code online so I also ordered some SLC acrylic stamps that weren't available on C&C too.
This card is made using a topper from the cd as well as some Primarni wrapping paper, card candi and a craftwork cards paper bow.

I started by folding a beige piece of A4 card into an easel card and covering both the base and front panel with metallic leopard print wrapping paper. I then took the topper from the cd and mounted it onto pink 'bling' cardstock. I attached my mounted topper onto the front of the easel and embellished it with a paper bow. I then used 6 pink leopard print card candis to act as the stopper for the easel.
I am entering this card into the following challenges:-
Graph'It 'anything goes' 31/5
Creative Inspirations 'birthday' 27/5 (I've left a space for the birthday message as it may need to be in Polish as I sell a lot of cards to Eastern European friends)
Crafters Cafe 'girly' 28/5
Totally Gorjuss 'buttons &/or bows' 31/5
This card is made using a topper from the cd as well as some Primarni wrapping paper, card candi and a craftwork cards paper bow.
I started by folding a beige piece of A4 card into an easel card and covering both the base and front panel with metallic leopard print wrapping paper. I then took the topper from the cd and mounted it onto pink 'bling' cardstock. I attached my mounted topper onto the front of the easel and embellished it with a paper bow. I then used 6 pink leopard print card candis to act as the stopper for the easel.
I am entering this card into the following challenges:-
Graph'It 'anything goes' 31/5
Creative Inspirations 'birthday' 27/5 (I've left a space for the birthday message as it may need to be in Polish as I sell a lot of cards to Eastern European friends)
Crafters Cafe 'girly' 28/5
Totally Gorjuss 'buttons &/or bows' 31/5
Monday, May 26, 2014
Muddy Mess
I made another card today using lots of old goodies but some of them haven't been used very much!

It's a card in my usual CAS style and was quite quick to create (apart from the colouring of the digi stamp). The digi image comes from an Angelica & Adam crafters companion cd-rom that I've had for a while but not used all that much. I coloured the image with a mix of promarkers and spectrum noirs. I then used walnut stain distress ink to dirty up the edges of the topper. I took two different colours of camouflage print paper from DCWV 'boys'A4 stack and cut them to mat the topper. I used a Sheena Douglass embossing folder to add muddy splats to the green paper and then inked it with the same walnut stain distress ink as the topper. I scrunched up the brown paper before teaching it to the card to add the dirty scruffy look and add another texture. I layered everything up onto a khaki green A5 card blank folded from a sheet of A4 card.
I am entering this card into the following challenges:-
A blog named hero 'embossing' 28/5
Catch the Bug 'photo inspiration' 31/5
Challenges 4 Everybody 'anything goes' 30/5
Crafty Catz 'embossing' 29/5
Digi Choosday 'day out' 3/6
Papertake Weekly 'cute' 27/5
Cutie Pie 'embossing' 7/6
It's a card in my usual CAS style and was quite quick to create (apart from the colouring of the digi stamp). The digi image comes from an Angelica & Adam crafters companion cd-rom that I've had for a while but not used all that much. I coloured the image with a mix of promarkers and spectrum noirs. I then used walnut stain distress ink to dirty up the edges of the topper. I took two different colours of camouflage print paper from DCWV 'boys'A4 stack and cut them to mat the topper. I used a Sheena Douglass embossing folder to add muddy splats to the green paper and then inked it with the same walnut stain distress ink as the topper. I scrunched up the brown paper before teaching it to the card to add the dirty scruffy look and add another texture. I layered everything up onto a khaki green A5 card blank folded from a sheet of A4 card.
I am entering this card into the following challenges:-
A blog named hero 'embossing' 28/5
Catch the Bug 'photo inspiration' 31/5
Challenges 4 Everybody 'anything goes' 30/5
Crafty Catz 'embossing' 29/5
Digi Choosday 'day out' 3/6
Papertake Weekly 'cute' 27/5
Cutie Pie 'embossing' 7/6
Wednesday, February 19, 2014
Angelica giggles
Just this morning, I had a delivery of the beautiful new Crafters Companion 'Angelica & Adam' double cd-rom that I ordered from C&C on Monday morning. It has some brilliant boy friendly images and cute girly ones too. This is the first card I've made using the digi stamps that are on cd 2. I'm really pleased with how it turned out although I'm not sure if I used enough pink! :-)

I started by printing the digi stamp from the cd to roughly half a sheet of A4 (the option that puts 2 photos on one sheet but slightly smaller because of not fitting to frame). I then coloured the image using my Spectrum Noirs but (for me) using a very limited selection. I tried not to blend the colours too much, particularly on the skirt, as after watching Leann from Crafters Companion doing her demos, I think I probably blend my colours together a little too much and lose the shading- I like how this has turned out anyway.
When I had finished colouring the image, I used an old Kanban mat as a stencil to mark out and hand cut the image to the finished shape. I did the same with a slightly larger mat onto some Kanban pink dot embossed card which I matted my topper onto. I then chose a piece of pink A4 card stock and folded it in half to make an A5 card blank. I wanted to add an extra something to the background but not too much to take away from the main image. In the end, I decided on some stamping. I used my Inkadinkado rectangle stamping gear and simple heart stamp to create the simple background design.
I mounted my topper up onto the base card and then added 4 small pink buttons in the corners. The final touch was to add some 'crystal' Stickles glitter glue to the girls dress and bows. You can't have a pink girly card without glitter on it somewhere, can you?
Close up of the new colouring style...

I am entering this card into the following challenges:-
Catch the Bug 'bingo challenge' buttons, pink/red, embossing
Craft your Passion 'girly' 24/2
Cutie Pie challenge blog 'spots' 1/3
Creative Inspirations 'buttons' 25/2
Crafters Companion 'Clean & Simple'
Crafters Companion are also having a DT call. I've entered, if you want more info there's a link here.
I started by printing the digi stamp from the cd to roughly half a sheet of A4 (the option that puts 2 photos on one sheet but slightly smaller because of not fitting to frame). I then coloured the image using my Spectrum Noirs but (for me) using a very limited selection. I tried not to blend the colours too much, particularly on the skirt, as after watching Leann from Crafters Companion doing her demos, I think I probably blend my colours together a little too much and lose the shading- I like how this has turned out anyway.
When I had finished colouring the image, I used an old Kanban mat as a stencil to mark out and hand cut the image to the finished shape. I did the same with a slightly larger mat onto some Kanban pink dot embossed card which I matted my topper onto. I then chose a piece of pink A4 card stock and folded it in half to make an A5 card blank. I wanted to add an extra something to the background but not too much to take away from the main image. In the end, I decided on some stamping. I used my Inkadinkado rectangle stamping gear and simple heart stamp to create the simple background design.
I mounted my topper up onto the base card and then added 4 small pink buttons in the corners. The final touch was to add some 'crystal' Stickles glitter glue to the girls dress and bows. You can't have a pink girly card without glitter on it somewhere, can you?
Close up of the new colouring style...
Catch the Bug 'bingo challenge' buttons, pink/red, embossing
Craft your Passion 'girly' 24/2
Cutie Pie challenge blog 'spots' 1/3
Creative Inspirations 'buttons' 25/2
Crafters Companion 'Clean & Simple'
Crafters Companion are also having a DT call. I've entered, if you want more info there's a link here.
Tuesday, February 18, 2014
prickly on the outside...
Another SWALK cd card today and I really love the topper image & the sentiment that goes with it. I've given the card a kind of dirty look using my distress inks.

I started with a dark green A4 sheet of card that I folded in half to make an A5 card base. The backing paper is from the SWALK cd but didn't stand out enough from the card so I inked it with a 'walnut stain' distress ink. I used the same ink to colour the edge of the message and then laid it onto my inking mat to pick up some of the other ink. I think the almost finger print look works really well. I attached the backing paper and the message to the card and then mounted the topper onto some brown mirror card. I finished the card by tying the raffia around the spine of the card.
I am entering this card into the following challenges:-
Digi Choosday 'anything goes' 25/2
Crafters Cafe 'vintage/shabby' 24/2
Kaboodles Doodles 'twine' 23/2

I started with a dark green A4 sheet of card that I folded in half to make an A5 card base. The backing paper is from the SWALK cd but didn't stand out enough from the card so I inked it with a 'walnut stain' distress ink. I used the same ink to colour the edge of the message and then laid it onto my inking mat to pick up some of the other ink. I think the almost finger print look works really well. I attached the backing paper and the message to the card and then mounted the topper onto some brown mirror card. I finished the card by tying the raffia around the spine of the card.
I am entering this card into the following challenges:-
Digi Choosday 'anything goes' 25/2
Crafters Cafe 'vintage/shabby' 24/2
Kaboodles Doodles 'twine' 23/2
Tuesday, January 14, 2014
winter wonderland
This card uses another topper that I coloured a while ago but ran out of time to make into a card. I've finally got round to using it, and it means that I've made 2 Christmas cards so far in January!!!

I coloured the topper using both Spectrum Noirs & Promarkers and then used a Kanban mat as a stencil to cut it into the decorative shape. I added a, hand cut, blue mirror card mat and a larger mat cut from Dovecraft 'Merry & Bright' snowman paper. To add extra detail to the 6x6 elegant edge Craftwork Cards card blank, I ran it through my grand callibur with a snowflake mask, and then gently rubbed on some pale blue chalk with my finger.
I am entering this card into the following challenges:-
Christmas Card Challenges 'anything goes with option of polka dots' 19/1
Catch the Bug 'winter wonderland' 18/1
Crafty-Hazlenut's Christmas Challenge 'winter weather' 17/1
Cute Card Thursday 'cold & frosty' 15/1
Creatalicious Challenges 'turquoise winter' 13/2

I coloured the topper using both Spectrum Noirs & Promarkers and then used a Kanban mat as a stencil to cut it into the decorative shape. I added a, hand cut, blue mirror card mat and a larger mat cut from Dovecraft 'Merry & Bright' snowman paper. To add extra detail to the 6x6 elegant edge Craftwork Cards card blank, I ran it through my grand callibur with a snowflake mask, and then gently rubbed on some pale blue chalk with my finger.
I am entering this card into the following challenges:-
Christmas Card Challenges 'anything goes with option of polka dots' 19/1
Catch the Bug 'winter wonderland' 18/1
Crafty-Hazlenut's Christmas Challenge 'winter weather' 17/1
Cute Card Thursday 'cold & frosty' 15/1
Creatalicious Challenges 'turquoise winter' 13/2
Sunday, December 15, 2013
winter cheer
Here's another SWALK card made using the digi stamps from the Crafters Companion cd-rom. I coloured this one a while ago so the hair isn't quite as good as it could be but I'm really happy with how the card turned out. Considering I coloured the image a while ago, it all matches really well.

I coloured the digi image with Spectrum Noirs & Promarkers and highlighted aspects such as the bow on the basket with stickles and the pearl necklace with perfect pearls. I used a Kanban mat as a stencil to cut the topper into an unusual shape and then added a pre-cut gold mirror card mat. The backing paper is from a new Papermania 6x6 paper pack and the tartan pattern matched perfectly so I just trimmed it down slightly and matted it onto a 6x6 card blank. I attached the topper and then used another paper sheet from the same 6x6 pad to cut out the poinsettia, stars & holly images that I decoupaged onto the card. I used a little more stickles and perfect pearls to add a highlight, including the freehand squiggles at the bottom.
I am entering this card into the following challenges:-
Creative Inspirations 'traditional christmas colours'
Creative Card Crew 'holly or poinsettia'
Songbird Challenges 'merry christmas'
Stampin' for the Weekend 'red'
Totally Gorjuss 'special Christmas'

I coloured the digi image with Spectrum Noirs & Promarkers and highlighted aspects such as the bow on the basket with stickles and the pearl necklace with perfect pearls. I used a Kanban mat as a stencil to cut the topper into an unusual shape and then added a pre-cut gold mirror card mat. The backing paper is from a new Papermania 6x6 paper pack and the tartan pattern matched perfectly so I just trimmed it down slightly and matted it onto a 6x6 card blank. I attached the topper and then used another paper sheet from the same 6x6 pad to cut out the poinsettia, stars & holly images that I decoupaged onto the card. I used a little more stickles and perfect pearls to add a highlight, including the freehand squiggles at the bottom.
I am entering this card into the following challenges:-
Creative Inspirations 'traditional christmas colours'
Creative Card Crew 'holly or poinsettia'
Songbird Challenges 'merry christmas'
Stampin' for the Weekend 'red'
Totally Gorjuss 'special Christmas'
Wednesday, December 11, 2013
the cats miaow
I'm back! It's been an absolutely manic few weeks at work and with a load of craft shows (where I've bought lits of new things) & craft fairs (where I've managed to sell a few bits too) I've not been making as much as I'd like! BUT, I've finally made another SWALK card today and have also managed to use up a bit of some Kanban papers that have been in my stash for years (no exaggeration!). Not sure what's wrong with me- I don't tend to do actually using stuff!!!

This was a really quick card to make- I started with a sheet of A4 white card that I folded into an A5 card blank. I then added the metallic Kanban paper, leaving just a small white border. The main image topper was a pre-coloured one from the SWALK cd and I again created the message myself using the verse writer function. I inked the edges of the toppers using 'dusty concord' distress ink and then mounted them onto a dull gold mirror board.
I am entering this card into the following challenges:-
Penny's Paper-Crafty Challenges 'feminine with a sentiment'
Cutie Pie Challenge Blog 'cute card for a special friend'

This was a really quick card to make- I started with a sheet of A4 white card that I folded into an A5 card blank. I then added the metallic Kanban paper, leaving just a small white border. The main image topper was a pre-coloured one from the SWALK cd and I again created the message myself using the verse writer function. I inked the edges of the toppers using 'dusty concord' distress ink and then mounted them onto a dull gold mirror board.
I am entering this card into the following challenges:-
Penny's Paper-Crafty Challenges 'feminine with a sentiment'
Cutie Pie Challenge Blog 'cute card for a special friend'
Saturday, October 26, 2013
let it snow, let it snow, let it snow!
I've been busy colouring this week, using some images from a cd-rom that I've had for a while but have recently re-discovered. I love it when you've forgotten exactly why you bought something and then look through it again and get that whole "ooooooo" again!
Anyway, this is another Christmas card using the Crafters Companion SWALK images.

I started by printing the image at the 4 to a page size, and then coloured it with a mix of promarkers & spectrum noirs. I used a Sakura glitter pen to highlight the snowflakes and then 'white opal' perfect pearls for the small snow blobs. I'm not yet an owner of any die-cutting shapes so I had to cut these out by hand- I used some Kanban mats as the stencil for the patterned paper and coloured image. I didn't have a stencil for the mirror layer so I used the same stencil as the topper and then just cut a little away from the pencil line to create the mat. The tree design paper is from a Dovecraft 'Merry & Bright' 6x6 paper pad which was a bargain last January! The card blank is from Craftwork Cards and already has the fancy edge that matches my chosen mat shape. To add a little extra interest to the plain white base card, I used a snowflake mask and 'picked raspberry' distress ink to stencil the snowflake design.
I am entering this card into the following challenges:-
Polkadoodles 'xmas'
Papertake Weekly 'oh Christmas Tree'
Creative Inspirations 'anything goes'
Graph'It 'alternative xmas colours'
Crafty Catz 'spots & stripes'
Anyway, this is another Christmas card using the Crafters Companion SWALK images.

I started by printing the image at the 4 to a page size, and then coloured it with a mix of promarkers & spectrum noirs. I used a Sakura glitter pen to highlight the snowflakes and then 'white opal' perfect pearls for the small snow blobs. I'm not yet an owner of any die-cutting shapes so I had to cut these out by hand- I used some Kanban mats as the stencil for the patterned paper and coloured image. I didn't have a stencil for the mirror layer so I used the same stencil as the topper and then just cut a little away from the pencil line to create the mat. The tree design paper is from a Dovecraft 'Merry & Bright' 6x6 paper pad which was a bargain last January! The card blank is from Craftwork Cards and already has the fancy edge that matches my chosen mat shape. To add a little extra interest to the plain white base card, I used a snowflake mask and 'picked raspberry' distress ink to stencil the snowflake design.
I am entering this card into the following challenges:-
Polkadoodles 'xmas'
Papertake Weekly 'oh Christmas Tree'
Creative Inspirations 'anything goes'
Graph'It 'alternative xmas colours'
Crafty Catz 'spots & stripes'
Thursday, October 24, 2013
snowflake kisses
This is my most recent card, and the start of a bit of a SWALK marathon. Last Christmas, I bought a Crafters Companion triple cd-rom featuring the SWALK images as digis to colour myself and 'Pawfect Pals' themed toppers. This is one of the digi designs that I have coloured myself.

I coloured my digi image with both Spectrum Noirs & Promarkers and added the snow using 'white opal' perfect pearls. I used a Kanban mat as a template to cut the topper into the decorative shape and then mounted it onto a purple mirror card mat that I also hand cut. I cut a larger mat (again using a Kanban mat as a stencil) from a pre-glittered DCWV paper. I wanted to layer the 3 parts onto a Craftwork Cards card blank that has the same shape to the edge as my toppers but I found that it looked a little plain. I therefore, decided to stamp some small snowflakes using a Versamark ink and to use a mix of lilac & blue mica powders to dust over the ink. This has given the base card a subtle sheen.

I also rubbed the versamark ink onto the edge of the card and dusted this with the lilac mica powders too.
I am entering this card into the following challenges:-
Graph'It 'xmas blues & purples'
Daring Cardmakers 'digital'

I coloured my digi image with both Spectrum Noirs & Promarkers and added the snow using 'white opal' perfect pearls. I used a Kanban mat as a template to cut the topper into the decorative shape and then mounted it onto a purple mirror card mat that I also hand cut. I cut a larger mat (again using a Kanban mat as a stencil) from a pre-glittered DCWV paper. I wanted to layer the 3 parts onto a Craftwork Cards card blank that has the same shape to the edge as my toppers but I found that it looked a little plain. I therefore, decided to stamp some small snowflakes using a Versamark ink and to use a mix of lilac & blue mica powders to dust over the ink. This has given the base card a subtle sheen.

I also rubbed the versamark ink onto the edge of the card and dusted this with the lilac mica powders too.
I am entering this card into the following challenges:-
Graph'It 'xmas blues & purples'
Daring Cardmakers 'digital'
Sunday, September 8, 2013
Work in Progress
It's amazing how 6 weeks off work seems to mean less crafting than when I'm at work 5 days a week and only have Sundays to play! But, I'm back at work now and so today has been a crafty day. Yesterday I decided to tidy my craft room (normally that ends in disaster but this time it worked out quite well) and I now have a 'Work in Progress' box for storing my printed digis that need colouring (rather than a table covered in things and no room to work!). I'm trying to colour at least 1 image per week and this is today's. As you'll see from the last photo, it's ridiculous how many colours I need to finish an image (+ flock & puffy white paint for snow!)


Sunday, January 20, 2013
s.w.a.l.k. 'new parents' card
I've been having a play with my new s.w.a.l.k. digi stamp cd rom and really loved some of the images for the slightly more unusual card sending moments e.g. new home, belated birthday & expecting a baby. They seemed perfect for the Basic Grey Challenges blog, challenge 85 'New Beginnings' http://basicgreychallenges.blogspot.co.uk/2013/01/challenge-85-new-beginningssomething-new.html. So here's my entry-

I started with a Craftwork Cards 6x6 fancy edge card. I drew round the card onto the back of a flamingo & giraffe print 6x6 paper from Basic Grey 'sugared' paper pad. The paper made me think of couples and love as the giraffes had little hearts above their heads. I cut out the paper to match the shape of the base card and attached it with double sided tape.
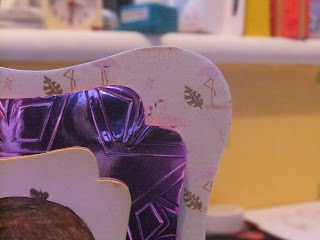
The topper was printed from my Crafters Companion s.w.a.l.k. cd-rom and coloured with Spectrum Noir pens. I used the leftover piece from a Kanban mat sheet, as a stencil, to draw the fancy shape around the image and then cut it out by hand. I inked it very lightly around the edges with 'Squeezed Lemonade' distress ink. I then got a matching Kanban silver mirror card mat slightly larger than the one I had cut myself. I used my Grand Calibur with a Crafters Workshop 'Mini Star Shower' 6x6 stencil to emboss a star design onto the mirror card mat. I then inked this with Tim Holtz Adirondack 'Wild Plum' alcohol ink to give it the pink tone to match the backing paper. I completed the card by using 3d foam tape to attach the mirror card layer and then the main topper.

I started with a Craftwork Cards 6x6 fancy edge card. I drew round the card onto the back of a flamingo & giraffe print 6x6 paper from Basic Grey 'sugared' paper pad. The paper made me think of couples and love as the giraffes had little hearts above their heads. I cut out the paper to match the shape of the base card and attached it with double sided tape.

The topper was printed from my Crafters Companion s.w.a.l.k. cd-rom and coloured with Spectrum Noir pens. I used the leftover piece from a Kanban mat sheet, as a stencil, to draw the fancy shape around the image and then cut it out by hand. I inked it very lightly around the edges with 'Squeezed Lemonade' distress ink. I then got a matching Kanban silver mirror card mat slightly larger than the one I had cut myself. I used my Grand Calibur with a Crafters Workshop 'Mini Star Shower' 6x6 stencil to emboss a star design onto the mirror card mat. I then inked this with Tim Holtz Adirondack 'Wild Plum' alcohol ink to give it the pink tone to match the backing paper. I completed the card by using 3d foam tape to attach the mirror card layer and then the main topper.
Subscribe to:
Posts (Atom)