Last time, my lesson was all about pyramage, so I felt that now would be a good time to talk about 'invertage' too. It should be a relatively quick lesson though as there's not too much new info today!
We learnt, last week, that pyramage involves layering up an image in the style of a pyramid using a range of basic shapes. Invertage is very similar in that it uses basic shapes but the images appears to layer inwards rather than outwards. I unfortunately do not have an example to show as it is not a technique I use very often but that doesn't mean that you won't want to.
You again start with 3/4 of the same image, but to prepare them, you cut out the middle of the image rather than cutting away the outside. Each time you make the centre gap smaller- you are essentially creating frames of the image of different thicknesses. You must leave 1 layer complete though to act as the base.
This style of decoupage is good for an image that has a natural frame or where the central image appears to be further back.
For further info on the basics of layering, refer to lessons 4 or 5 on decoupage or pyramage respectively.
Sunday, September 30, 2012
Thursday, September 27, 2012
Kanban 'so feminine' toppers- 'Rock Chick'
Kanban recently bought a fabulous blockbuster to Create & Craft/Ideal World that has some great toppers & backing cards in it. The Blockbuster contains 2 sets- 'so feminine' & 'so macho' (that has to be sung by the way) and may still be available if you check the website. With club discount (& voucher codes in the back of the club magazine) I got the kit and the new autumn 2012 promarker set for less than £35- bargain. It even arrived just 2 days after I ordered it- a-may-zing!
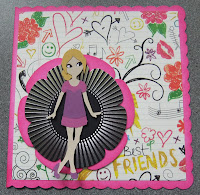
This is the first card that I've made from my favourite topper sheet entitled 'Rock Chick'

This is the first card that I've made from my favourite topper sheet entitled 'Rock Chick'

This topper sheet has 6 different music themed toppers all in black & white (with a hint of pink). As you can see, I have used just 1 topper to create this card.
I started with an A4 sheet of black card that I folded using the 12cm line on my ScorPal score board. This has given me a slightly off square card with a smaller front flap. I used 2 papers from the DCWV 'Rockstar' 8x8 stack as a mat onto each side of the card. I then mounted the topper onto some Black/Pink Core'dinations 'Black Magic' cardstock that I had distressed the edges of and attached it to the front flap of the card with 3d foam.
I finished the card by placing the 3 black gemstones on the bottom right hand side of the card, tying a black organza bow around the spine and finally attaching the 'Rock & Roll' badge. This is something I've had in my stash for ages and came from Paperchase in a set of 9. I cut the safety pin off the back of the badge using wire cutters so that the badge would lay flat when attached with 3d foam. They cost about £3 for the set and make a really nice bold accent to finish the card.
Sunday, September 23, 2012
Step by Step Cardmaking- Lesson 5- pyramage
Following on from the last lesson about decoupage, I thought that it would be a good idea to talk about pyramage today as it is a natural follow on and could cause confusion if we don't address it.
Pyramage is very similar to decoupage and the method is exactly the same. You need exactly the same tools (although a proper paper trimmer helps) and you will get a very similar result of a layered final image but as the name suggests, the finished style will be that of a pyramid.
The first picture, below, is the example I used to show decoupage in my previous lesson
.jpg) The layers are cut to match the shape of the image.
The layers are cut to match the shape of the image.
In pyramage, the shape of the image is not really important- a basic shape e.g. square, circle, triangle or rectangle is used instead (as shown below)
.jpg) Each layer starts off the same and is cut in a slightly smaller size for each layer used. They are again stacked using either 3d foam or silicone glue (see lesson 4).
Each layer starts off the same and is cut in a slightly smaller size for each layer used. They are again stacked using either 3d foam or silicone glue (see lesson 4).
Pyramage can be easier or harder than decoupage depending on the image used but I feel it is easier to create your own design as I did here starting from just 4 exactly the same images (printed from the Papermania 'Enchanted' cd-rom). You do have to be careful that when you cut the layers, take an even amount from each side though, otherwise the balance of the design will be off.
Pyramage is very similar to decoupage and the method is exactly the same. You need exactly the same tools (although a proper paper trimmer helps) and you will get a very similar result of a layered final image but as the name suggests, the finished style will be that of a pyramid.
The first picture, below, is the example I used to show decoupage in my previous lesson
.jpg)
In pyramage, the shape of the image is not really important- a basic shape e.g. square, circle, triangle or rectangle is used instead (as shown below)
.jpg)
Pyramage can be easier or harder than decoupage depending on the image used but I feel it is easier to create your own design as I did here starting from just 4 exactly the same images (printed from the Papermania 'Enchanted' cd-rom). You do have to be careful that when you cut the layers, take an even amount from each side though, otherwise the balance of the design will be off.
Sunday, September 16, 2012
The London Line 2
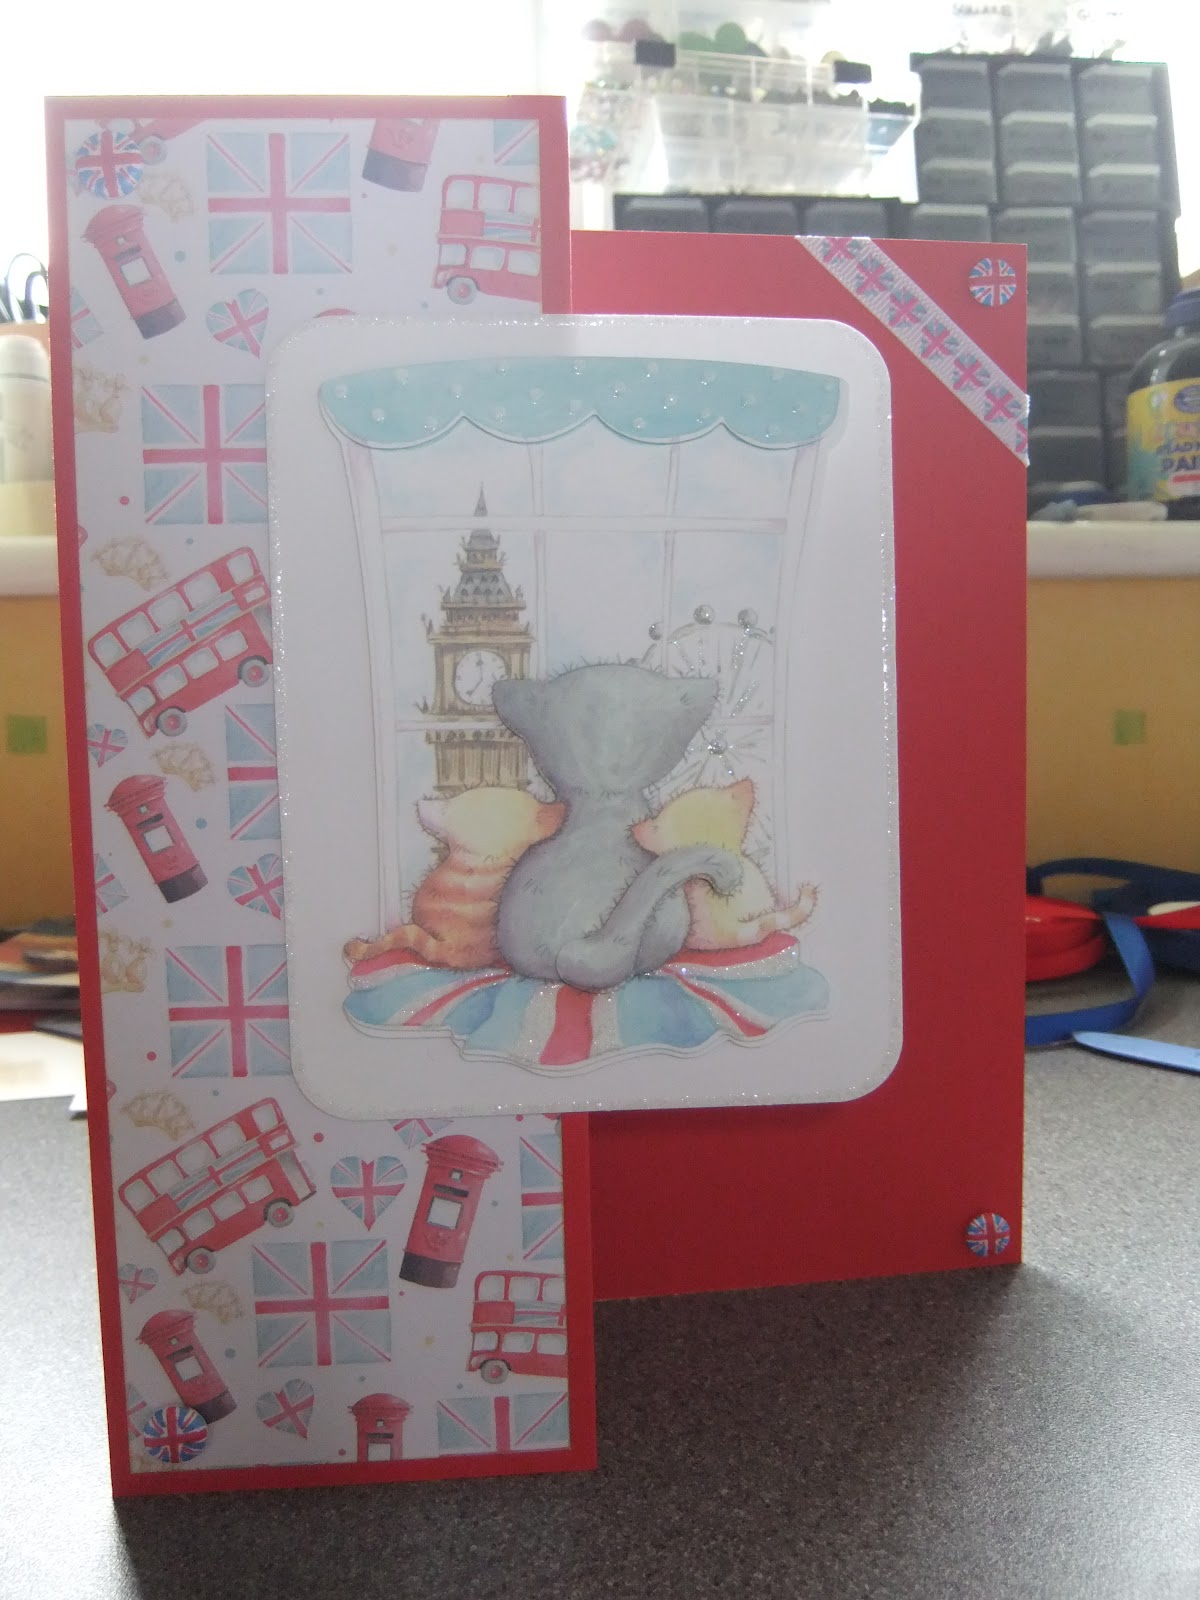
This is the second card I've made using the lovely Trimcraft 'The London Line' die-cut decoupage, ribbon and papers.
 I started with a bright red A4 sheet of card that I folded into what I call a 'fold back card'. Start by folding the card in half and then fold the front piece back on itself- if you have a scoreboard, score on the half fold and the A4 gatefold lines.
I then took one of the backing papers from the 8x8 paper pack (which is already the perfect height for a card this size) and cut it to layer onto the front panel leaving a small red border. The topper came from the die-cut decoupage pack and is already beautifully glittered. I simply mounted this onto the flap with 3d foam, making sure that I only put the foam onto the left hand side of the topper (as you look at it).
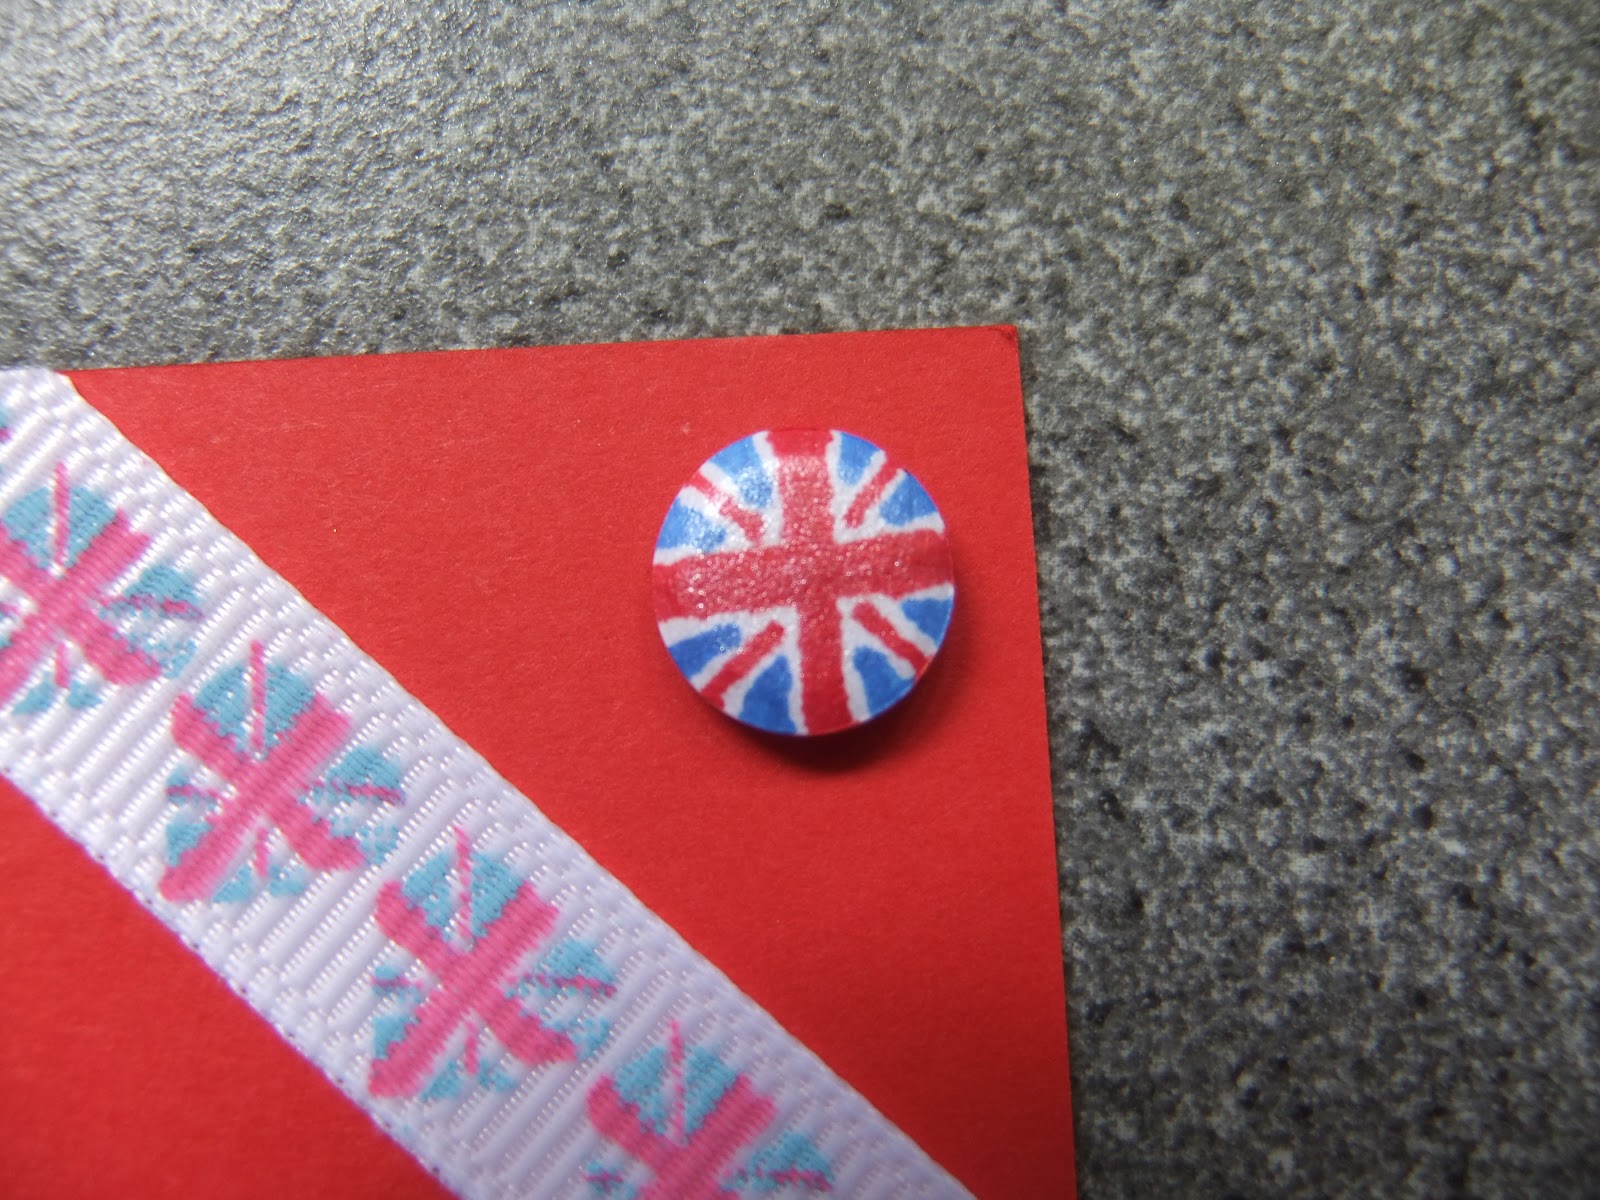
I then took a small piece of the Union Jack heart ribbon and stuck some double sided tape on the back of it to attach over the corner of the card. At this point, I knew that the card was almost finished but I felt that it just needed a finishing touch- Card Candi of course! Problem was that I couldn't decide which colour of candi to use to stand out on the card. Red wouldn't show up on the back, white was a but dull & the blue just didn't look right but a moment of inspiration later, I had the most fabulous card candi ever!!!
 Created very simply by starting with a white card candi and using my 'Poppy Red' & 'True Blue' promarkers (with fine point tips attached) to colour the design. It took a pretty steady hand but was worth it- and the pearlescence of the original colour shows through too!
I then took one of the backing papers from the 8x8 paper pack (which is already the perfect height for a card this size) and cut it to layer onto the front panel leaving a small red border. The topper came from the die-cut decoupage pack and is already beautifully glittered. I simply mounted this onto the flap with 3d foam, making sure that I only put the foam onto the left hand side of the topper (as you look at it).
I then took a small piece of the Union Jack heart ribbon and stuck some double sided tape on the back of it to attach over the corner of the card. At this point, I knew that the card was almost finished but I felt that it just needed a finishing touch- Card Candi of course! Problem was that I couldn't decide which colour of candi to use to stand out on the card. Red wouldn't show up on the back, white was a but dull & the blue just didn't look right but a moment of inspiration later, I had the most fabulous card candi ever!!!
Thursday, September 13, 2012
Step by Step Cardmaking- Lesson 4- decoupage
Decoupage is one of the most common ways of creating toppers for cards and a great place to start as you can really use a wide range of unexpected things to make your cards.
Decoupage cards were the very first cards I started to make and all you really need is a good pair of sharp scissors (non-stick are best) and some 3-d foam (you can get this from poundland for £1!) or silicone glue, if you prefer. And of course the card that you are going to mount your topper onto (with or without matting & layering- see lesson 3).
Decoupage essentially means taking an image and layering it to create dimension. Each layer removes part of the image (usually the background). The card below shows this in detail.
.jpg)
The 1st layer (base layer/original image) shows the entire design. The 2nd layer brings forward the cats head, the right hand side balloon and the girls head & dress. The 3rd layer is just the girls head as this would be furthest forward in real life.
Decoupage can be bought in ready made sets where the different layers are already determined for you. Alternatively, you can buy sheets that have the same flat image 3 or 4 times for you to choose which aspects to cut away. It is easier to start with the pre-determined style until you are confident with how it works. You can also get some decoupage that is 'die-cut' (already cut out for you) which is, of course, even easier. These normally come in sheets where you just remove each piece from the sheet where it is held with small knicks of the card. It is best to cut these carefully with your scissors.
As you become more confident with how the images need to change then you can use lots of different things to create that decoupage.
- A large scale image on wrapping paper will work.
- You can print a copyright free image from the internet or from a special crafting cd-rom.
- You can use stamps to create your images (more about this in lesson 8)
- Calendars work really well but you'll need to buy at least 2/3. This is how I started and if you buy your calendars in February/March then you can get them cheap too. The cards below were made from calendars bought for just 50p. That means I got 12 decoupaged toppers for just £1!


When you have all of your images cut out, then you need to layer them up. Start with the largest/background image and place onto your table- decoupage works best when you can stand over your image and make sure you place the next layer accurately, so you don't want your workstation to be too high. Take your next layer and on the back apply the 3d foam or silicone glue- you may be thinking what's the difference? or which is best? well...
- 3d foam is quick, cheap and no mess. It is like a double sided tape but thick so it raises your image and creates dimension at a set level (the thickness of the foam- different thicknesses are available but I stick to the cheap poundland stuff). You do have to be accurate when sticking your image down as there in not much room for manoeuver once it's stuck.
- Silicone Glue is a thick glue that can create dimension at a range of levels depending on how much you put on. 'Blobs' (technical term) are used all around the back of the image and when you layer the image, you do not press it down fully, creating the dimension. It can be a bit messy and is nowhere near as cheap as the 3d foam. BUT- the glue takes a while to dry so if you place your image incorrectly, there is the chance to move it.
The choice is really up to you but as I said, I always use the 3d foam.
Anyway... put the 3d foam/silicone glue onto the back of the image and make sure that you apply it liberally- not every tiny space but don't leave big gaps- your image may sag! Remove the 3d foam backing (if using) and then carefully place the smaller image directly over the same image on the base card. Continue for each layer making sure that you start with the largest image and work through to the smallest each time.
Simple but very effective so give it a try! You'll never look back...
Tuesday, September 11, 2012
Mulberry Wood reindeers
I'm starting to build a bit of a collection of crafting cd-roms after initially not being such a big fan of them. I've been won over by the idea that once you've got them, you can print as many designs as you want and actually really make them great value for money. I recently got the new Crafters Companion 'Christmas in Mulberry Wood' cd-rom which is just £14.99 on their website http://www.crafterscompanion.co.uk/. It has all the usual Crafters Companion cd features including backing papers, inserts, decoupage, toppers, writing papers, envelopes & more and has lots of very cute woodland creatures getting ready for Chrismas.
I have used both the backing papers and the decoupage to create this card.
 I started with a piece of A4 white card that I cut to make into a square base card. After folding the card into a square, I then folded the front diagonally from bottom left, to top right, to create the twisted easel base card. The backing paper was printed from the cd and then cut into 2 matching squares one for the base of the card and one as the twisted easel topper. I decoupaged the topper and then mounted it onto silver mirror card before attaching to the centre of the topper. I then used some Stickles to add some extra detail to the image. I then used 5 holographic star Card Candi circles to act as the stopper for the card.
If you are making easel cards then Card Candi is a must have and don't forget that you can just buy a white set and colour them with your promarkers or spectrum noirs. Stamping them is also a great way to theme them to your project and there are special Candi Stamps available (I'll hopfullu soon have some pictures to post of the cards I've made with my new set!). You will want all the pre-coloured ones (and patterns, foils etc.) but they are great value anyway!
I have used both the backing papers and the decoupage to create this card.

If you are making easel cards then Card Candi is a must have and don't forget that you can just buy a white set and colour them with your promarkers or spectrum noirs. Stamping them is also a great way to theme them to your project and there are special Candi Stamps available (I'll hopfullu soon have some pictures to post of the cards I've made with my new set!). You will want all the pre-coloured ones (and patterns, foils etc.) but they are great value anyway!
Sunday, September 9, 2012
Step by Step Cardmaking- Lesson 3- matting & layering
Matting & Layering is one of the key techniques used in card making to add emphasis to your chosen toppers. It gives you a chance to use some of the beautiful patterned papers & cards that are available as well as speciality cardstock such as mirror card or glitter card.
Matting & Layering is simply the technique of using these different papers/cards to place a border around the main topper of your card. It can be used to make the topper stand out from the base card and provides a professional finish. It is one of the simplest techniques but very effective. Accurate measuring is important and a paper trimmer or guillotine can help although a pair of scissors and a ruler will do.
Start by measuring the topper you wish to layer and make a note of this measurement (it's always handy to have some scrap paper where you are working). When you have chosen your 'mat', cut this paper/card to either 0.5cm or 1cm extra on each side e.g. starting with a topper that is 10cm x 14cm, for a narrow border cut the mat at 11cm x 15cm or for a slightly wider border, cut the mat at 12cm x 16cm.
You can use more than 1 layer if you wish but I would not advise more than 2- it can be too much.
The examples below give an idea of how to choose the colours you will use for you matting & layering but the main advice is to try things out & use your own imagination.

This card has a mainly white base card and
a topper using shades of blue. To continue
the icy theme, I chose to mat the topper with
silver mirror card.

This card also has a white base card but the purple mirror card was chosen as the
mat to enhance the purple of the flowers
in the topper.

For this card, I chose a contrasting green
mat as both the backing paper & topper
were mainly pink. If I had used a pink mat,
it would not have made the topper stand
out as I wished.

For this card, I chose a contrasting turquoise foil
paper for the mat. I chose to use a turquoise mat
as this was one of the background colours in the
main topper.
Almost forgot to mention how to attach the layers together! D'oh! I usually use double sided tape but if you want to add extra dimension then you can use 3d foam. If you're going to use 3d foam, buy the really cheap stuff from poundland but I would advise spending a little more (not much) on your double sided tape. Poundland do sell it and if you're only using card then it's fine but if you use it on a thinner paper than the tape will start to show through after a while. I always stock up on my double sided tape when I go to the NEC as you get at least 10 rolls for £5 and there's lots on each roll too. I usually get it from the 1craft1 stand and I think they have a website so you could always have a look for it there but it may not be the same bargain. My advice- go to the NEC in November, you'll get lots of inspiration too, & you can use your Tesco clubcard vouchers on their triple deal to get your ticket!
Friday, September 7, 2012
Stamped Gorjuss Girl
In a previous post, I shared some photos of some 'Gorjuss Girls' cards that I had made using a couple of cheap calendars picked up earlier in the year. Well, always one for a bargain, a couple of weeks ago when I went to my local Hobbycraft store, I could be found rummaging through their bargain boxes! Much to my delight, I found some Gorjuss Girl stamps that were around half their RRP. Woo-Hoo! I picked up 3 different designs, 1 of which I have used so far. The card below is made using the 'Purrfect Friend' stamp which is available on www.bubblyfunk.co.uk (although my set had other smaller images as well as the large girl design).
 As well as the 'Gorjuss Girl' stamp, I have also used a multi-layered star stamp that is part of a range relatively new to Hobbycraft of their own small acrylic stamps. There are lots of different designs available and they are all just £1 each- they are particularly great for creating your own backgrounds.
I actually started this card by cutting down some white card to stamp the topper onto by measuring the stamp design and then adding a border all the way around. I stamped the design with a Versamark inkpad and then embossed it with a black 'Heat it up' powder. I did this as I wanted to watercolour my design so needed a permanent image and I find that if the image is embossed, then the watercolour does not run quite as much. I used my Anita's/Papermania watercolour pens, putting some of the ink onto an acrylic block and then using my waterbrush to transfer this to the image. This method stops you getting lines on your design as you would if you applied the ink directly to the paper and then tried to watercolour it.
When the image was dry, I used some Stickles glitter glue just to highlight the heart in the girls hair (you can't really see it in the photo though). After more drying time, I then used my 'Dusty Concord' distress ink to change the card from white to purple, while still leaving a white border around the stamped image. The purple stars were then stamped using a Hobbycraft stamp and a 'Grape Jelly' memento ink. I then mounted my topper onto some black glitter paper, using my scissors to scrape away some of the glitter so that my topper would stick more strongly.
The base card is an A4 white card, folded in half and then, again, inked with the 'Dusty Concord' distress ink. I used the same Hobbycraft star stamp to create a background design but this time used a black memento ink for a slight contrast. The card is finished with a small black bow that was originally white and I coloured using my black promarker. I used my heat gun to speed up the drying time of the ink and found that this did shrink and harden the ribbon slightly but it was still ok (could be a nice future effect though!). It just finished the card nicely. I have, however, recently managed to get some small black bows from the Marks & Spencer outlet at the Springfields shopping centre in Spalding, Lincolnshire. They were reduced to £1 for about 25- they are supposed to be as a wedding table decoration but are the perfect size for cards and saves you from spending ages trying to tie a very fiddly bow!
Sunday, September 2, 2012
Cricut- Paper Doll Teen Scene
A couple of weeks ago, I posted about a new cricut cartridge that I'd ordered from the Card Craft UK website. Well, here are my first 2 cards made from my lovely new Paper Doll-Teen Scene cartridge.
I've got the other 2 paper doll cartridges and have used them a lot for a long time but the one thing I would have liked from them was for the characters to be a bit more realistic. This is where the newer Paper Doll cartridge is great. There are 2 male & 3 female characters in different poses with about 10 different outfits, hairstyles & accessories per character.
The handbook is set out to try and make the creation of the characters easier by showing you an idea of the colour to use and the layers are recorded in order. This does mean that you have some card/paper waste through the layering but it is easier to follow. I found that paper worked better than card as you do end up with quite a few layers at the end and can have a very thick topper if you use card.

These are the 2 cards that I have made so far, both starting with a Craftwork Cards 8x8 scallop edge base card. The one on the left was inked with new 'Picked Raspberry' distress ink. Both cards were then layered with DCWV papers from 12x12 stacks (teenage dream & la creme). I then used Kanban stackable mats to create the layers behind the characters, inking the pink one, and using a mat as a template to create the blue one to exactly match the colour used in the dress. The card on the right was finished with silver mirror card candi.
Here are the characters in detail


I'll try to explain why some paper is wasted when you make them! You basically start by cutting the entire character (+ fringe) in your chosen hair colour. You then cut the whole body in white, the whole body with eye holes in black and then the whole body with larger eye holes in your chosen skin colour. This is done to create the effect of the fabulous eyelashes which look great, but I think could probably be done without also cutting the legs, arms etc. If I find a way to solve this, I'll blog about it but I am really happy with the results. You then choose your colours for clothes, shoes etc. and layer up the image as shown in the handbook, which is now much more detailed than the old versions.
I've already made up some other characters but just not got round to putting them on cards yet- I'll post them when I do.
Also, the variation of the characters is great and as well as generally girly cards, there are graduation outfits, wedding style dresses & sporty outfits. The male characters include skateboarders, guitarists & sports such as basketball as well as more general gym/weights. There is also a really good one with headphones & an ipod. They will make great cards for those famous 'awkward teenagers' that all crafting companies seem to be going for at the moment!
I've got the other 2 paper doll cartridges and have used them a lot for a long time but the one thing I would have liked from them was for the characters to be a bit more realistic. This is where the newer Paper Doll cartridge is great. There are 2 male & 3 female characters in different poses with about 10 different outfits, hairstyles & accessories per character.
The handbook is set out to try and make the creation of the characters easier by showing you an idea of the colour to use and the layers are recorded in order. This does mean that you have some card/paper waste through the layering but it is easier to follow. I found that paper worked better than card as you do end up with quite a few layers at the end and can have a very thick topper if you use card.
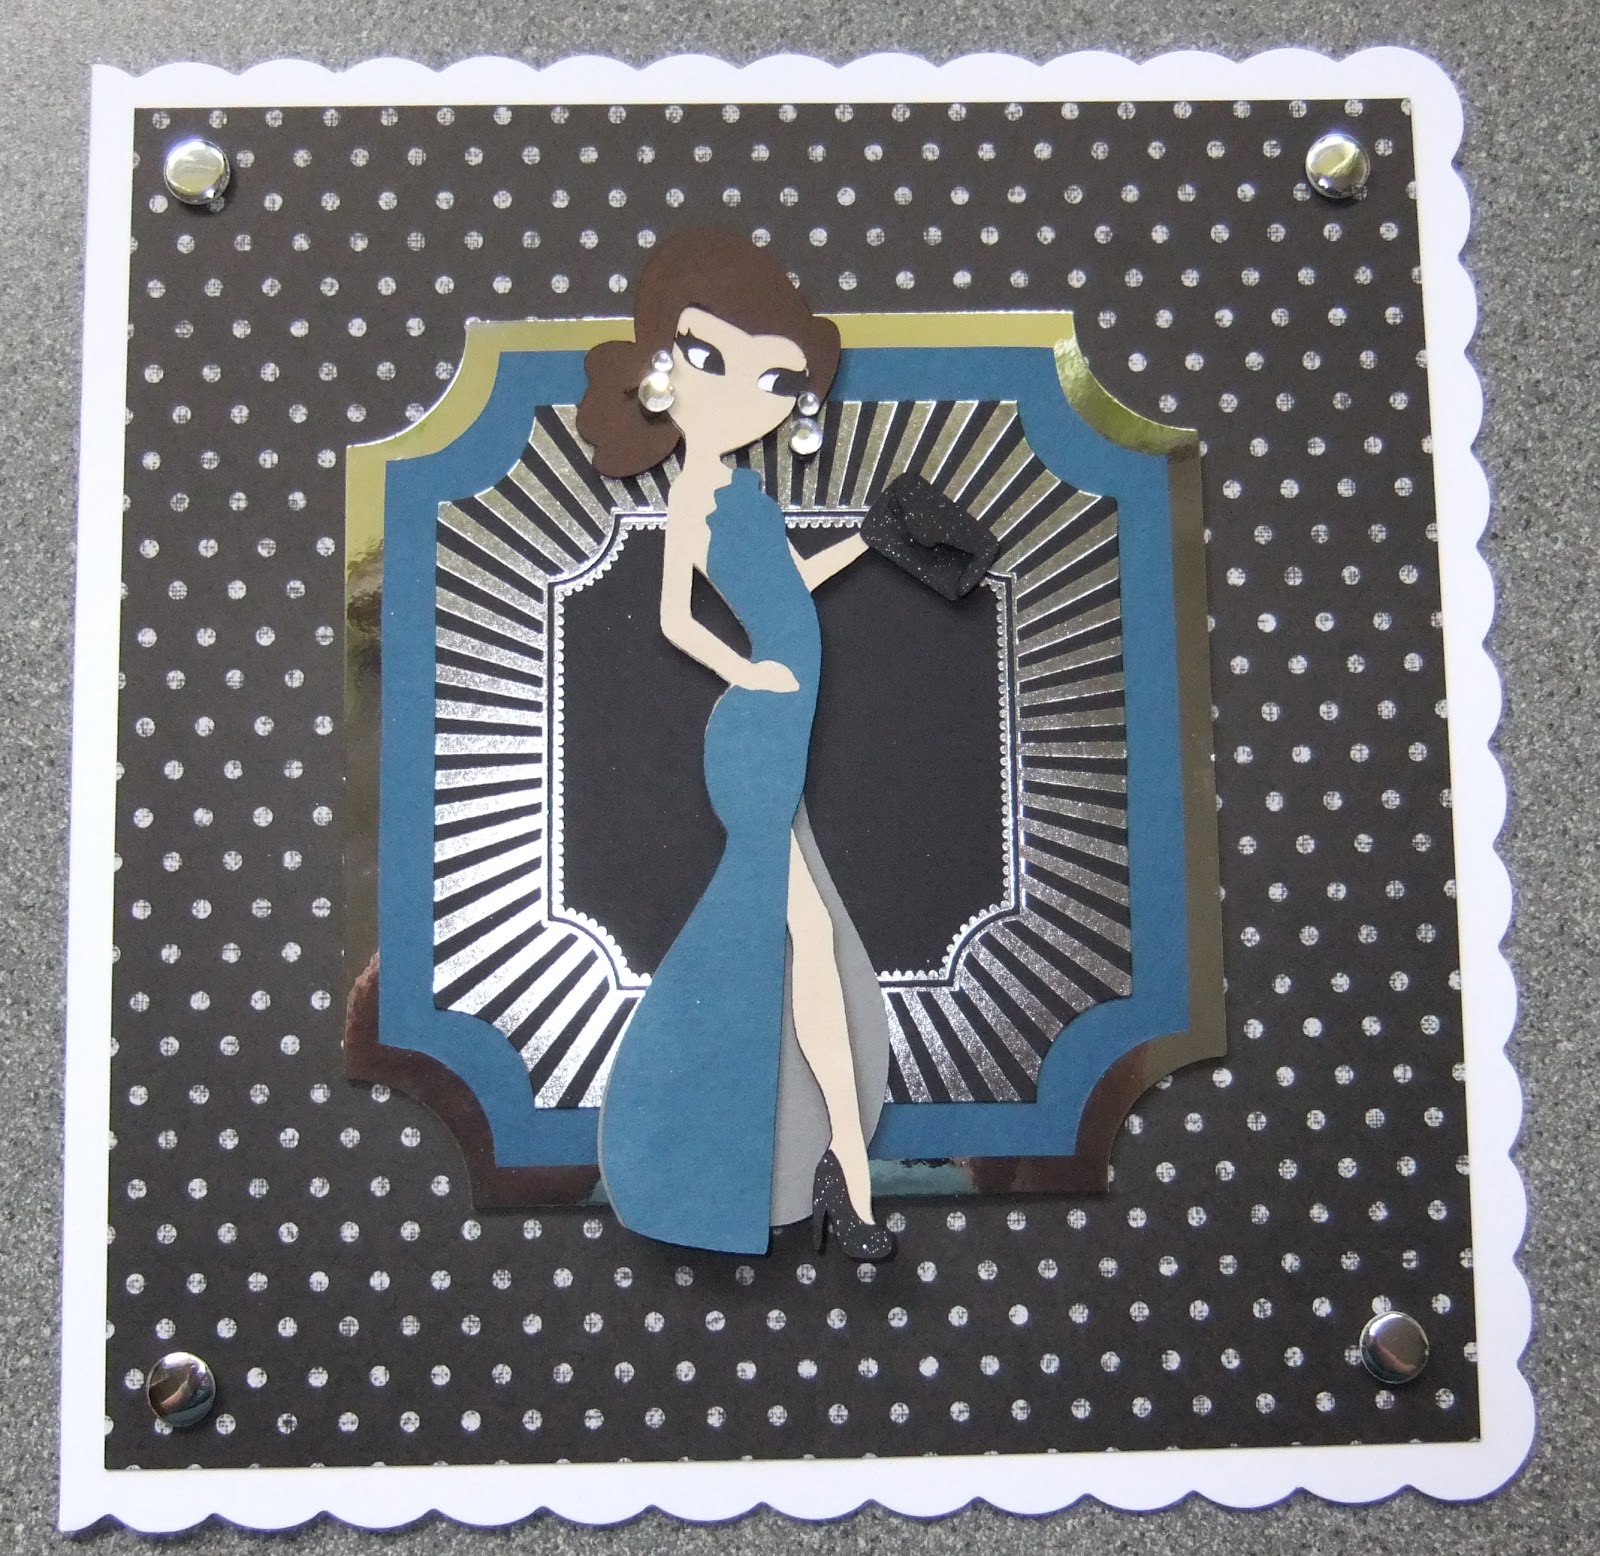

These are the 2 cards that I have made so far, both starting with a Craftwork Cards 8x8 scallop edge base card. The one on the left was inked with new 'Picked Raspberry' distress ink. Both cards were then layered with DCWV papers from 12x12 stacks (teenage dream & la creme). I then used Kanban stackable mats to create the layers behind the characters, inking the pink one, and using a mat as a template to create the blue one to exactly match the colour used in the dress. The card on the right was finished with silver mirror card candi.
Here are the characters in detail


I'll try to explain why some paper is wasted when you make them! You basically start by cutting the entire character (+ fringe) in your chosen hair colour. You then cut the whole body in white, the whole body with eye holes in black and then the whole body with larger eye holes in your chosen skin colour. This is done to create the effect of the fabulous eyelashes which look great, but I think could probably be done without also cutting the legs, arms etc. If I find a way to solve this, I'll blog about it but I am really happy with the results. You then choose your colours for clothes, shoes etc. and layer up the image as shown in the handbook, which is now much more detailed than the old versions.
I've already made up some other characters but just not got round to putting them on cards yet- I'll post them when I do.
Also, the variation of the characters is great and as well as generally girly cards, there are graduation outfits, wedding style dresses & sporty outfits. The male characters include skateboarders, guitarists & sports such as basketball as well as more general gym/weights. There is also a really good one with headphones & an ipod. They will make great cards for those famous 'awkward teenagers' that all crafting companies seem to be going for at the moment!
Subscribe to:
Posts (Atom)